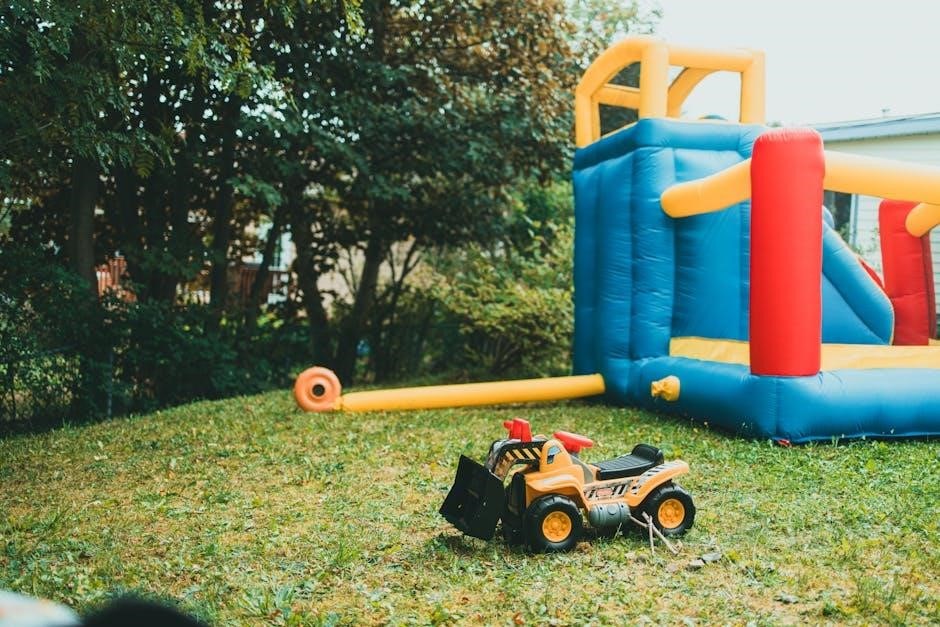
The Bounce Pro 14ft Trampoline offers generous jumping space, supporting up to 220lbs, and arrives in one convenient box for easy setup.
This trampoline is ASTM safety certified, ensuring a secure and enjoyable experience for users, while meeting stringent safety regulations.
Comprehensive guides are available, detailing assembly, safety protocols, and maintenance for the trampoline and its optional basketball system.
What is the Bounce Pro 14ft Trampoline?
The Sportspower Bounce Pro 14ft Trampoline is designed for outdoor recreational use, providing a safe and fun jumping experience for families and individuals.
It features a heavy-duty steel frame constructed for durability and stability, coupled with a UV-resistant safety enclosure to protect jumpers.
This model, specifically TR1463A-ENC-WMC, includes a jump mat engineered for optimal bounce and responsiveness, enhancing the overall enjoyment.
Shipped in a single box, it simplifies the delivery process, and its ASTM certification guarantees adherence to rigorous safety standards, offering peace of mind.
Key Features and Specifications
The Bounce Pro 14ft Trampoline boasts a 14-foot diameter, providing ample jumping space, and a maximum weight capacity of 220 pounds for secure use.
Its construction includes a heavy-duty steel frame, ensuring long-lasting durability, and a UV-resistant safety enclosure, protecting against sun damage and enhancing safety.
Key specifications include the model number TR1463A-ENC-WMC, and ASTM safety certification, verifying compliance with industry standards.
The trampoline ships in one box for convenient transport and assembly, offering a complete recreational solution for outdoor enjoyment.
Intended Use and Safety Precautions
The Bounce Pro 14ft Trampoline is designed for recreational outdoor use by individuals adhering to weight limits and safety guidelines.
Always supervise children during use, and limit the number of jumpers to prevent collisions and injuries. A single jumper is recommended for optimal safety.
Inspect the trampoline before each use, checking for damage to the mat, springs, and enclosure. Ensure proper padding is in place.
Avoid performing flips or somersaults without proper training, and never jump on a damaged or improperly assembled trampoline.

Unboxing and Parts Inventory
Carefully unpack the Bounce Pro 14ft Trampoline, verifying all components are present against the parts list for model TR1463A-ENC-WMC.
Ensure a complete inventory before beginning assembly, noting the frame, mat, enclosure, springs, and any included accessories.
Checking the Contents of the Box
Upon receiving your Sportspower Bounce Pro 14ft Trampoline, begin by carefully inspecting the box for any signs of damage during shipping. Once opened, systematically check off each component against the included parts list – model TR1463A-ENC-WMC is key.
Confirm the presence of the trampoline frame sections, the jump mat, safety enclosure netting, springs, enclosure poles, and all necessary hardware like bolts and connectors.
Don’t overlook smaller parts such as padding and the optional basketball system components if purchased. A thorough check now prevents delays later during assembly, ensuring a smooth and safe setup process.
Identifying All Components (Frame, Mat, Enclosure, Springs, etc.)
The trampoline frame consists of multiple steel sections designed to connect, forming the circular base. The jump mat is typically constructed from a durable, woven polypropylene material. The safety enclosure features UV-resistant netting supported by padded poles.
You’ll find a substantial quantity of high-tension springs, crucial for the bounce, alongside connecting hardware.
Identify the frame cover padding, designed to protect jumpers, and any basketball system parts if included. Familiarizing yourself with each component before assembly streamlines the process and ensures correct installation.
Parts List Verification – Model TR1463A-ENC-WMC
Verify all components against the parts list included with model TR1463A-ENC-WMC. This ensures nothing is missing before you begin assembly. The list details the number of frame sections, spring quantities, and enclosure pole counts.
Confirm the presence of the jump mat, safety net, padding, and all associated hardware – bolts, connectors, and tools.
Carefully check for any damage to parts during shipping. A complete inventory prevents delays and ensures a safe, structurally sound trampoline.

Frame Assembly
Connect the frame pieces securely using the provided bolts and connectors, ensuring a tight fit. Prioritize stability and levelness during this crucial step.
Connecting the Frame Pieces
Begin by laying out all frame components on a flat, protected surface to prevent scratches or damage. Carefully align the frame sections, noting the pre-drilled holes for bolt insertion.
Insert the provided connectors into the designated slots, ensuring they click securely into place. Then, using the appropriate bolts and washers, begin fastening the frame pieces together.
Tighten the bolts gradually in a criss-cross pattern to distribute pressure evenly and avoid warping the frame. Do not fully tighten until all sections are connected, allowing for minor adjustments. Double-check all connections for proper alignment and secure fastening before proceeding.
Securing the Frame with Bolts and Connectors
Once all frame pieces are aligned with connectors in place, systematically tighten each bolt using the provided tool. Maintain the criss-cross pattern to ensure even pressure distribution across the entire frame structure.
Avoid over-tightening, as this could potentially strip the threads or damage the frame components. A firm, secure fit is the goal, not maximum force. Regularly check each bolt as you progress.
Confirm all bolts are flush and securely fastened, verifying that no connectors are loose or misaligned; A properly secured frame is crucial for the trampoline’s stability and user safety.
Ensuring Frame Stability and Levelness
After bolt tightening, assess the frame’s stability by gently applying pressure to various points. It should remain firm and resist wobbling. Use a level to verify the frame is perfectly horizontal on all sides.
If unevenness exists, adjust the ground beneath the trampoline legs or utilize shims to achieve a level surface. An unlevel frame compromises safety and can lead to premature wear and tear.
Double-check all connections and ensure the frame sits squarely on the ground before proceeding with mat installation. A stable, level frame is the foundation for safe and enjoyable bouncing.

Mat Installation
Securely attach the springs to both the mat and frame, working in a star pattern for even tension. This ensures proper mat alignment and bounce quality.
Attaching the Springs to the Mat
Begin by carefully attaching the springs to the mat’s spring pockets, ensuring each spring is firmly seated. A spring puller tool can significantly ease this process, protecting your hands and ensuring consistent attachment.
Work your way around the mat, attaching springs evenly to maintain balanced tension. Avoid stretching the springs excessively during installation, as this can compromise their elasticity and lifespan.
Double-check each spring connection to confirm it’s securely fastened before proceeding to the next step. Proper spring attachment is crucial for a safe and enjoyable bouncing experience, preventing potential mat displacement during use.
Connecting the Mat to the Frame
With the springs attached to the mat, carefully position the mat over the trampoline frame. Begin connecting the springs to the frame’s v-rings, working in a star pattern to distribute tension evenly.
Utilize a spring puller tool to assist in stretching the springs over the v-rings, ensuring a secure and consistent connection. Avoid uneven tension, which can lead to instability and potential damage to the trampoline.
Once all springs are connected, re-check each attachment for firmness and proper seating. A correctly connected mat will sit securely on the frame, providing a safe and responsive bouncing surface.
Spring Tensioning and Adjustment
Consistent spring tension is crucial for optimal bounce and safety. After initial mat connection, inspect each spring to ensure uniform stretch and attachment to both the mat and frame.
If uneven tension is detected, use a spring puller to adjust individual springs, adding or relieving stretch as needed. Avoid over-tensioning, which can damage the springs or frame.
Regularly check spring tension during use and maintenance. Slight adjustments may be necessary over time as the springs settle. Proper tension contributes to a smooth, controlled, and enjoyable bouncing experience.
Enclosure Assembly
Securely install enclosure poles, then attach the safety net, connecting it firmly to both the poles and the trampoline frame for complete protection.
Installing the Enclosure Poles
Begin by carefully positioning the enclosure poles around the trampoline frame, ensuring they are evenly spaced for optimal stability and safety; These poles provide crucial support for the safety net, preventing jumpers from accidentally falling off the trampoline.
Secure each pole to the frame using the provided hardware, tightening the connections firmly but avoiding over-tightening, which could damage the frame or poles. Double-check that all poles are upright and securely fastened before proceeding to the next step.
Proper pole installation is paramount for a safe jumping experience, so take your time and verify each connection before moving forward with the enclosure assembly.
Attaching the Safety Net to the Poles
Carefully unroll the safety net and drape it over the installed enclosure poles, aligning the net’s attachment points with the corresponding slots or hooks on the poles. Ensure the net is evenly distributed around the trampoline frame for consistent protection.
Secure the net using the provided clips, straps, or ties, fastening it firmly to each pole. Work your way around the entire circumference of the trampoline, ensuring a snug and secure fit. Regularly check the attachments for tightness.
A properly attached net is vital for preventing accidental falls and ensuring a safe jumping environment for all users.
Connecting the Enclosure to the Frame
Once the safety net is secured to the poles, connect the enclosure system to the trampoline frame itself. Locate the designated attachment points – typically loops or clips – along the bottom edge of the net.
Carefully attach these points to the trampoline frame, ensuring a tight and secure connection. This step reinforces the enclosure, preventing gaps and providing an additional layer of safety during use. Double-check all connections.
A robust connection between the enclosure and frame is crucial for overall trampoline stability and user protection.

Basketball System Installation (If Applicable)
If your model includes a basketball system, assemble the hoop and backboard according to the separate instructions provided. Then, securely attach it to the trampoline frame.
Assembling the Basketball Hoop and Backboard
Begin by carefully unpacking all basketball system components, verifying against the parts list to ensure everything is present. Attach the backboard to the supporting frame using the provided bolts and washers, tightening securely with the appropriate tools.
Next, mount the hoop to the backboard assembly, again utilizing the included hardware. Ensure the net is properly attached to the hoop, allowing for free movement during play. Double-check all connections for stability before proceeding to the next installation phase.
Proper assembly is crucial for safe and enjoyable basketball play on your trampoline.
Attaching the Basketball System to the Trampoline
Carefully position the assembled basketball system onto the trampoline frame, aligning the mounting brackets with the designated attachment points. Securely fasten the system using the provided clamps and bolts, ensuring a snug and stable fit.
Double-check all connections, applying appropriate torque to the bolts to prevent loosening during use. Verify the system’s stability by gently testing its resistance to movement. A wobbly system indicates a need for re-tightening or adjustment.
Prioritize a secure attachment for safe gameplay.
Ensuring Basketball System Stability
Regularly inspect the basketball system’s attachment points for any signs of loosening or wear. Tighten bolts as needed to maintain a secure connection to the trampoline frame, preventing unwanted movement during play.
Check the backboard and hoop for cracks or damage, addressing any issues promptly to avoid potential hazards. Ensure the net is properly attached and in good condition for optimal gameplay and safety.
Prioritize consistent checks to guarantee long-lasting stability.
Safety Features and Inspection
The Bounce Pro features a safety enclosure, padding, and a frame cover, all crucial for minimizing injury risk during use.
Always perform a pre-jump inspection, verifying all components are secure and in good working order before each use.
Understanding the Safety Enclosure
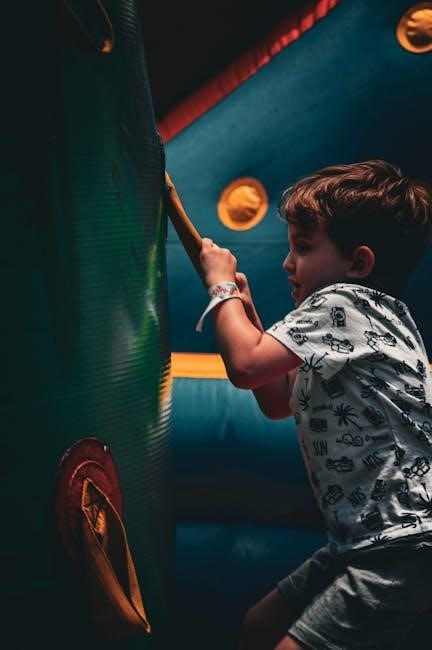
The Sportspower Bounce Pro trampoline’s safety enclosure is a vital component, designed to prevent jumpers from falling off the trampoline during use. It consists of UV-resistant netting securely attached to padded enclosure poles.
Ensure the netting is properly taut and free of tears or holes before each use. Regularly inspect the pole padding for damage, replacing it if necessary to avoid injury. The enclosure’s height is designed to contain jumpers effectively.
Proper installation and consistent inspection of the enclosure are paramount for maintaining a safe jumping environment. Always supervise children while they are using the trampoline, even with the enclosure in place.
Padding and Frame Cover Installation
Proper padding installation is crucial for minimizing impact injuries during trampoline use. The Bounce Pro trampoline includes frame padding designed to cover the steel frame, eliminating hard surfaces.
Securely attach the padding to the frame using the provided straps or Velcro closures, ensuring complete coverage; Regularly inspect the padding for wear and tear, replacing it if damaged. The padding should fit snugly against the frame.
A properly installed frame cover significantly enhances safety, protecting jumpers from contact with the metal frame; Consistent checks of the padding’s security are essential.
Pre-Jump Inspection Checklist
Before each use, a thorough inspection is vital for safe bouncing. Check the safety enclosure for tears or damage, ensuring secure attachment to the frame and poles. Inspect the jump mat for any rips, holes, or excessive wear.
Verify spring connectivity, confirming each spring is firmly attached to both the mat and the frame. Examine the frame itself for bends, breaks, or rust. Ensure all padding is securely in place, covering the frame adequately.
Remove any objects from the mat and surrounding area. A consistent pre-jump check minimizes risk;

Weight Capacity and User Limits
This trampoline boasts a maximum weight capacity of 220 lbs. Limit jumping to a recommended number of users to ensure safety and optimal performance.
Consider age and skill level when allowing jumpers access, prioritizing a secure bouncing experience for everyone involved.
Maximum Weight Limit (220 lbs)
The Sportspower Bounce Pro 14ft trampoline is engineered with a robust frame capable of supporting a maximum user weight of 220 pounds. Exceeding this limit compromises the structural integrity of the trampoline and significantly increases the risk of injury.
It’s crucial to enforce this weight restriction diligently, especially when multiple jumpers are present. Regularly remind users of the 220lb limit to maintain a safe bouncing environment. Prioritizing adherence to this specification ensures the longevity of the trampoline and, most importantly, the well-being of its users.
Consistent monitoring and responsible usage are key to preventing accidents and maximizing the enjoyment of this outdoor recreational equipment.
Recommended Number of Jumpers
For optimal safety and enjoyment on the Bounce Pro 14ft trampoline, it is strongly recommended to limit the number of jumpers to one at a time. While the trampoline boasts a 220lb weight capacity, multiple users simultaneously increase the risk of collisions and injuries.
Allowing only one jumper ensures sufficient space for safe maneuvering and reduces the strain on the springs and frame. This practice significantly minimizes the potential for accidents and extends the trampoline’s lifespan.
Supervise children closely and enforce the single-jumper rule consistently.
Age and Skill Level Considerations
The Bounce Pro 14ft trampoline is designed for recreational use, but age and skill level are crucial factors for safe operation. Younger children require constant, direct adult supervision to prevent falls and ensure they understand basic safety rules.
Beginners should start with simple bounces and gradually progress to more complex maneuvers as their coordination and confidence improve. Avoid attempting flips or somersaults without proper training and spotting.
Users should be physically capable of maintaining control during jumping activities.

Trampoline Maintenance
Regular inspection of springs, the mat, and enclosure is vital for continued safety and longevity. Cleaning and rust prevention are also key!
Regular Inspection of Springs and Mat
Consistent checks of the trampoline’s springs are crucial; look for any signs of stretching, rust, or breakage. Replace damaged springs immediately to maintain safe jumping conditions and prevent potential injuries.
The jumping mat itself requires frequent inspection for tears, wear, or damage to the stitching. Pay close attention to areas around the spring attachments, as these are common stress points.
Ensure all spring covers are securely in place, adequately padding the springs and frame to minimize impact risks. A proactive approach to inspection extends the trampoline’s lifespan.
Cleaning the Mat and Enclosure
Regular cleaning of the jumping mat is essential for maintaining a safe and hygienic bouncing surface. Use mild soap and water, avoiding harsh chemicals that could damage the material or pose a risk to jumpers.
The safety enclosure should also be cleaned periodically to remove dirt, leaves, and debris. Inspect the netting for any tears or weaknesses during cleaning, addressing them promptly.
A soft brush or cloth can effectively remove surface grime. Ensure both the mat and enclosure are completely dry before allowing use, preventing slippery conditions.
Frame Rust Prevention
Protecting the steel frame from rust is crucial for the longevity of your Bounce Pro trampoline. Regularly inspect the frame for any signs of corrosion, particularly after exposure to wet conditions or during winter storage.
Clean the frame with a mild detergent and water, removing any dirt or debris that could trap moisture. After cleaning, allow the frame to dry completely.
Consider applying a rust-resistant coating or sealant to vulnerable areas, providing an extra layer of protection against the elements and extending the trampoline’s lifespan.
Storage and Winterization
Disassembly is key for long-term storage, protecting the trampoline from weather damage. Securely store components in a dry location, shielded from the elements.
Disassembly for Long-Term Storage
Preparing your Bounce Pro trampoline for extended storage requires careful disassembly. Begin by removing the safety enclosure, detaching the net from both the poles and the frame. Next, carefully disconnect all springs, storing them in a labeled bag to prevent loss.
Following spring removal, disassemble the trampoline frame, separating each section. The basketball hoop, if installed, should also be removed. Once disassembled, clean all parts thoroughly before storing them indoors, ideally in a dry, sheltered area like a garage or shed, protecting them from harsh weather conditions.
Protecting the Trampoline from the Elements
Prolong the life of your Bounce Pro trampoline by shielding it from weather damage. A trampoline cover is essential for preventing UV degradation of the jumping mat and enclosure netting. During harsh conditions, consider partial or full disassembly, storing components indoors.
Regularly inspect the frame for rust, applying a protective coating if necessary. Secure the trampoline firmly to the ground, especially during windy seasons, to prevent tipping or movement. Proper care ensures years of safe and enjoyable bouncing!
Proper Storage Location
Choose a dry, level location for storing disassembled trampoline parts during the off-season; A garage, shed, or covered patio are ideal, protecting components from rain, snow, and direct sunlight. Avoid damp basements or areas prone to flooding, as moisture can cause rust and mildew.
Ensure adequate ventilation to prevent condensation buildup. Store the mat and enclosure separately to avoid stretching or damage. Keep all hardware – springs, bolts – organized and readily accessible for reassembly next season.